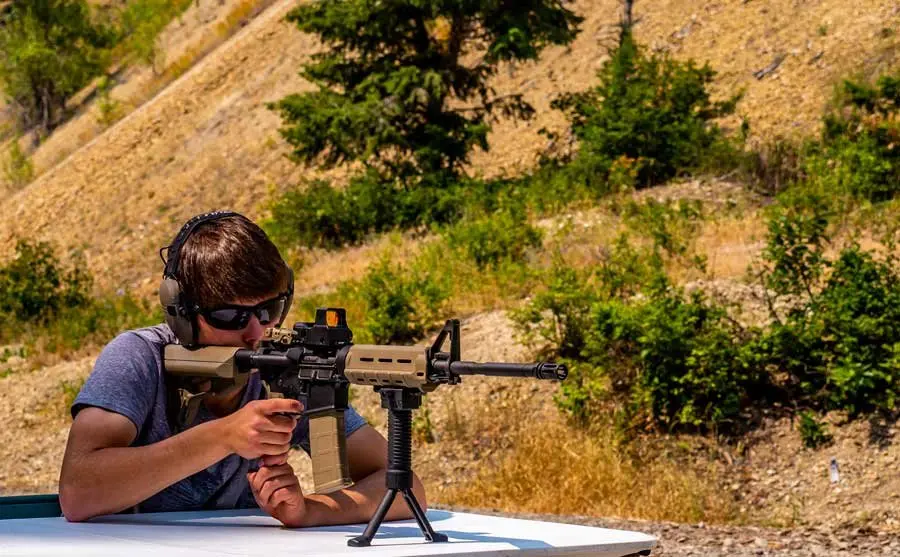
Having a proper shooting stance is essential for getting the most accuracy out of your firearm and improving your skills as a shooter. A solid shooting stance provides the basis for the development of your firearm skills at the range and can help you during a self-defense encounter. With proper practice, you can make a good firing stance a natural habit.
Let’s take a look at some of the best shooting stances for both long guns and handguns that are sure to make you a more effective shooter.
Note: It is important to note that you should always keep the firearm pointed in a safe direction and keep your finger off of the trigger until you are ready to fire.
HANDGUN SHOOTING STANCES
ONE-HANDED
A one-handed shooting stance is primarily for situations where you have an injured hand or have something occupying your other hand. These are important to practice, but should only be employed when necessary.
BULL'S EYE
In the Bull’s eye shooting stance, the off hand is placed on the hip to prevent it from getting struck while you are firing. The body faces 90-degrees away from the target with your head facing down the length of the extended arm. This provides a slim profile for increased protection from return fire and is a very precise method of aiming.
Unfortunately, this technique causes slow target acquisition and results in poor recoil management due to the one-handed approach.
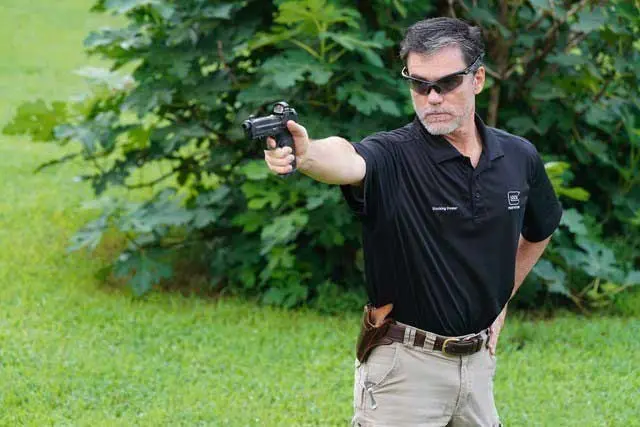
POWER POINT
For the Power Point shooting stance, the off hand is placed on the chest in a balled fist to ensure it does not get shot while you are firing. The rest is the same as the Bull’s Eye stance. The Body faces 90-degrees away from the target with the head facing down the length of the extended arm. It also provides a slim profile to protect from return fire and is a very precise method of aiming.
However, it provides the same slow target acquisition and poor recoil management that plagues the Bull’s eye shooting stance.
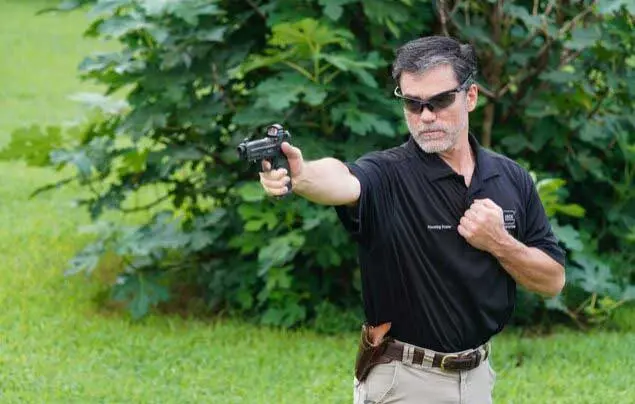
STRONG HAND RETENTION
When performing the Strong-Hand Retention shooting technique, the off hand is placed on the chest in a balled fist like in the Power Point stance.
However, instead of extending the shooting arm, the shooting hand is held close to the chest. The body faces squared to the target and the sights are not used due to the handgun’s positioning. This makes it a good option for when an attacker is on top of you or is quickly gaining on your position because it allows for a fast shot out of the draw.
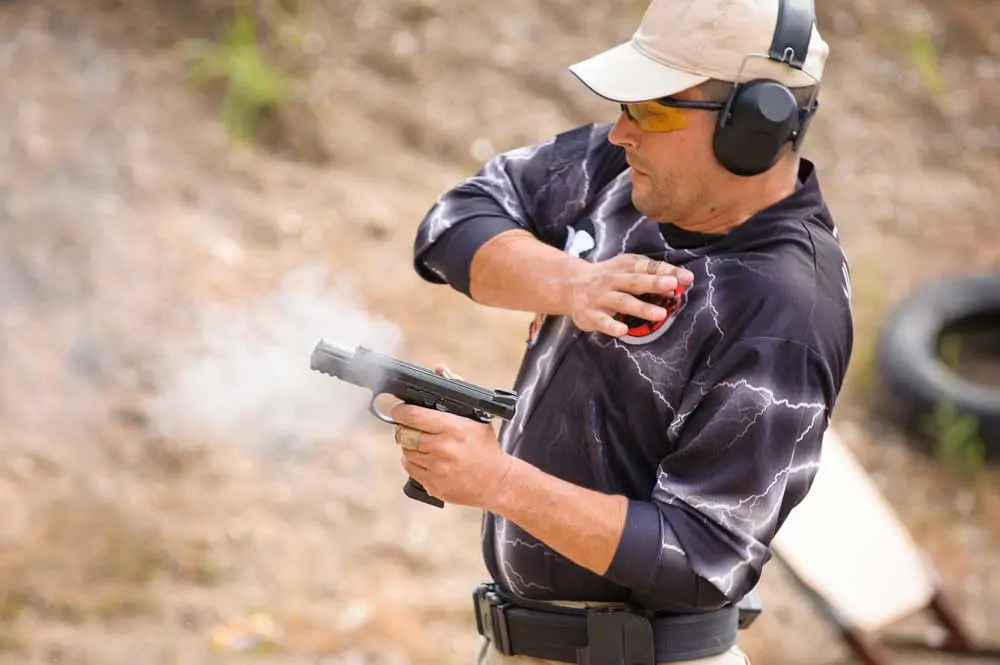
TWO-HANDED SOOTING STANCES
Two-handed shooting positions provide more support for the firearm, allowing you to shoot faster and more accurately. These should be your main focus while training as they will be the most likely to be used.
ISOSCELES
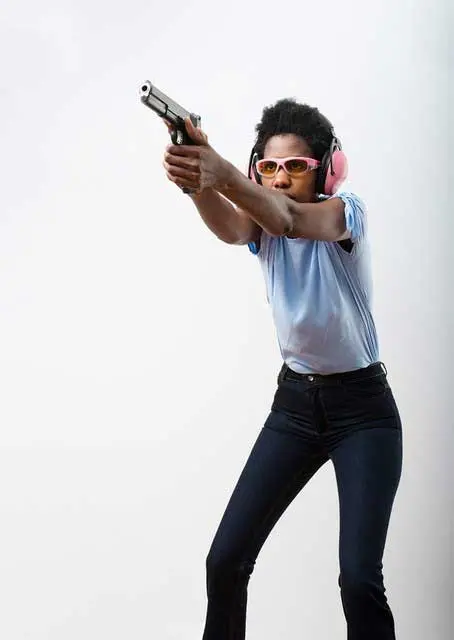
If you just picked out your first handgun, this is probably where you'll start. The Isosceles shooting stance is a symmetrical stance where the shooter is squarely facing the target with both hands on the pistol. This stance is fundamentally what was described in the section above for general pistol shooting. The feet are shoulder-width apart and are facing forward.
This is a very quick and intuitive stance that allows for natural sight alignment. Additionally, this shooting stance is good for people wearing body armor because it will expose more of the protected areas and less of the areas that are not covered.
Unfortunately, from a defensive aspect, it is not as good for shooters without any armor, as it exposes many vital areas of the body and presents a larger target. It also results in slow footwork if you have to shoot on the move.
POWER ISOSCELES MODIFICATION
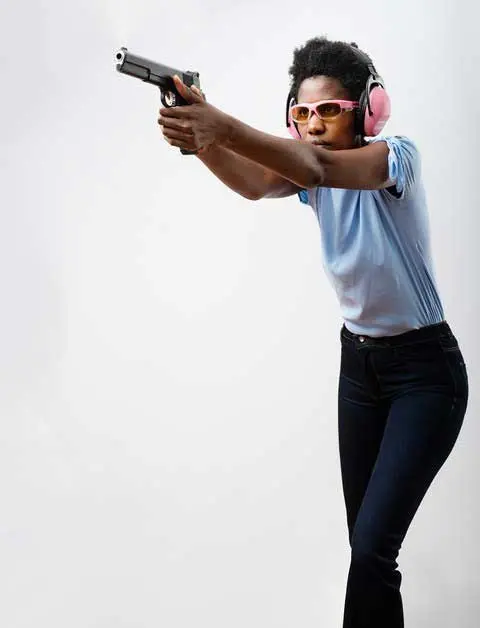
The Power Isosceles shooting stance provides a slight modification where one foot is placed slightly forward with a bent knee or slight crouch. This helps absorb the recoil and provides a more stable shooting platform. For this modification you will also reduce the rigidity of the off-hand arm.
WEAVER
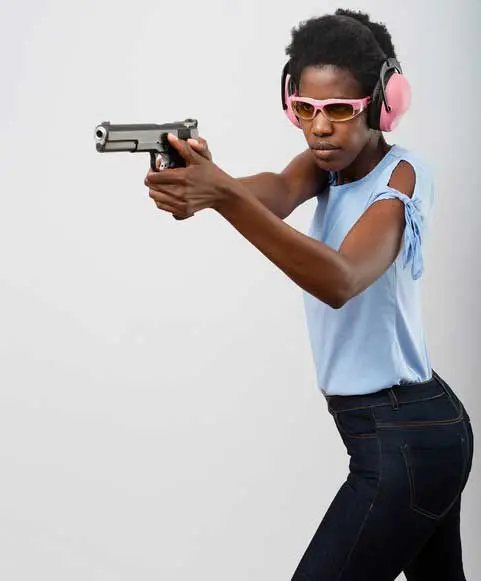
The Weaver shooting stance is another popular defensive two-handed shooting technique. For the Weaver, the off-hand foot is placed forward and the majority of your weight is placed on this leg.
Neither arms are locked, and the shooting-hand elbow points out while the off-hand elbow points down.
When gripping the firearm, the dominant hand pushes forward and the off hand pulls backward. This provides a very firm grip, allowing for great recoil mitigation. The foot positioning also allows for fast pivot transitions. However, this stance forces the dominant eye to be the same as the shooting hand. If it is not, an unnatural head tilt is required to line up the sights.
CHAPMAN MODIFICATION
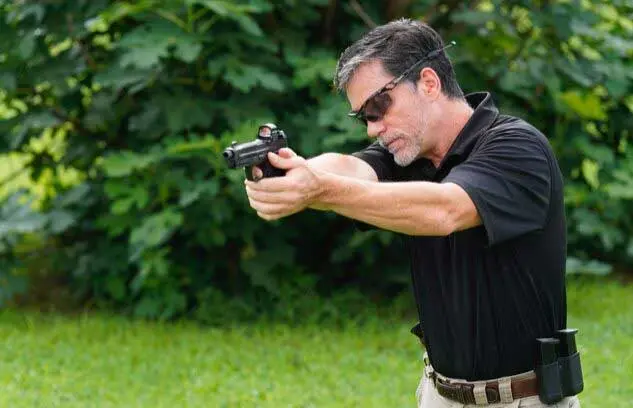
The Chapman shooting stance provides a modification to the Weaver stance that fixes problems for cross-eye dominant shooters. The Chapman maintains the foot positions of the Weaver and relaxes the upper body. The shooter locks the strong arm forward like in the Power Isosceles, and the off hand remains bent, which brings the head into a centered position over the strong arm.
This further increases recoil control, however, it is not natural and requires practice to assume proper positioning.
LONG GUN SHOOTINGS STANCES
Rifle shooting positions are different from those of the handgun because of the inherent way you shoot a long-gun. Unlike with a handgun, these positions differ more in your body positioning, rather than your technique.
PRONE
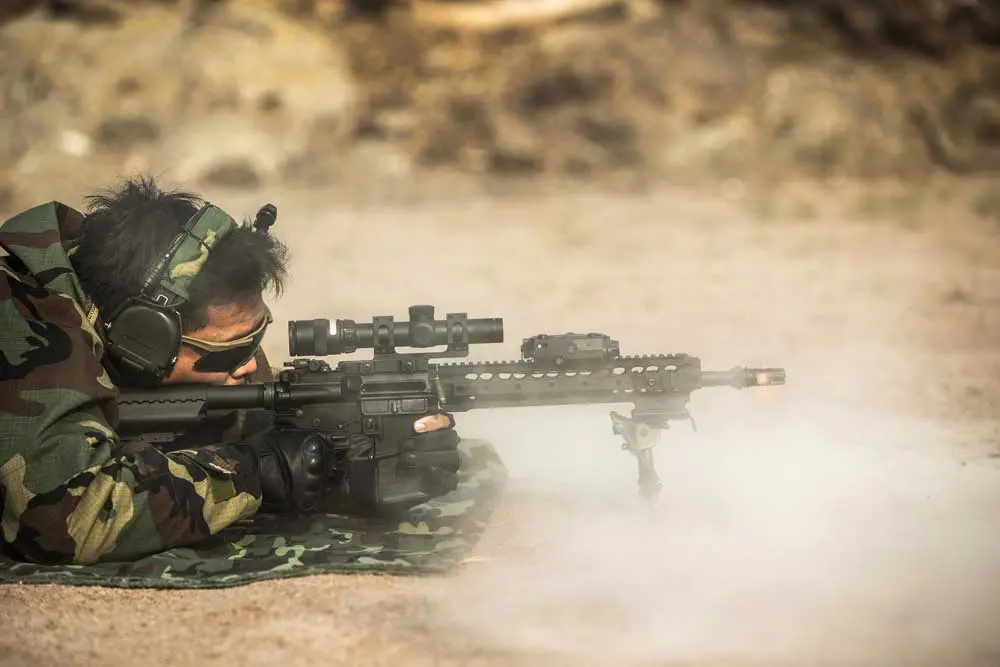
When shooting prone, the shooter lays down on their stomach. Both arms are bent upward to raise the firearm.
You can also use a shooting rest, bipod or natural material to help support the gun. Firing in the prone shooting position allows for maximum stability and provides the most accuracy.
Unfortunately, the low angle may limit the shooter’s field of view and the position takes time to assume, limiting maneuverability. This shooting position is primarily for taking long-range shots.
SITTING
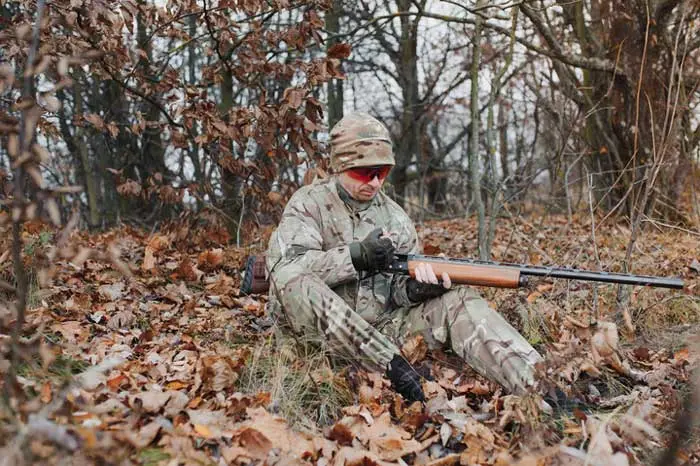
The sitting shooting stance can be done with the legs apart or crossed. Then, both arms hold up the firearm and are supported on each leg. This position is slightly quicker to assume and more maneuverable than prone, but still requires some time. This position is good if you are going to be waiting a decent amount of time for a good shot.
KNEELING
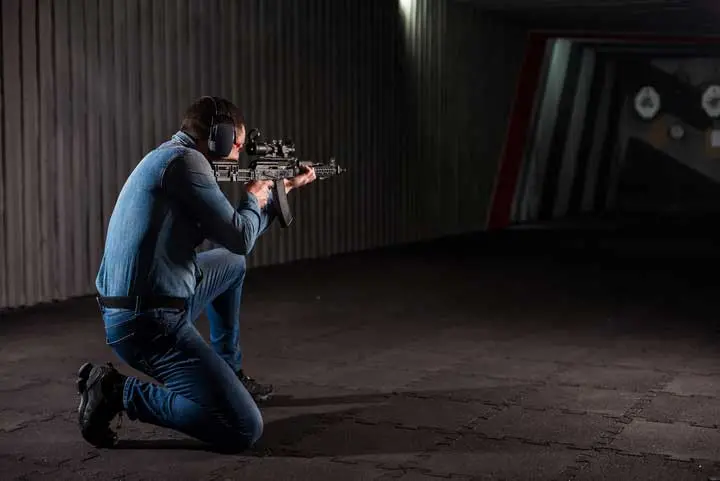
The kneeling shooting position requires the rear knee to be placed on the ground. The other leg is bent and the knee supports the elbow of the forward arm. It is important to note that the elbow should not rest on the kneecap, as this bone-to-bone contact can cause the firearm to wobble.
This shooting stance allows you to raise above ground cover and is slightly more maneuverable than sitting. This position is fairly quick to assume and provides a more stable platform for longer-range spontaneous shots.
STANDING
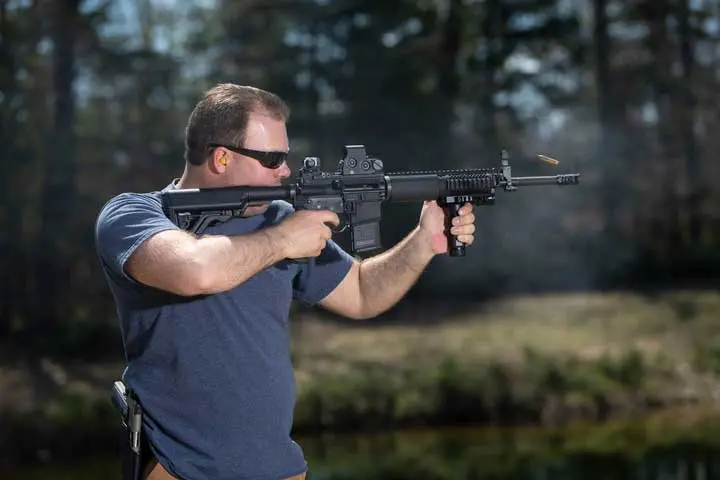
When shooting a long gun while standing, the support arm holds the forend of the firearm and the shooting hand holds the grip. The shooter’s elbows point out slightly to help support the gun. This shooting stance is the most maneuverable and provides the greatest target visibility, however, you gain no support for the firearm other than muscle strength and the stock in your shoulder pocket. If you know you'll be doing a lot of shooting while standing, you'll want to factor in the weight of the gun when picking out a rifle.
HASTY SLING
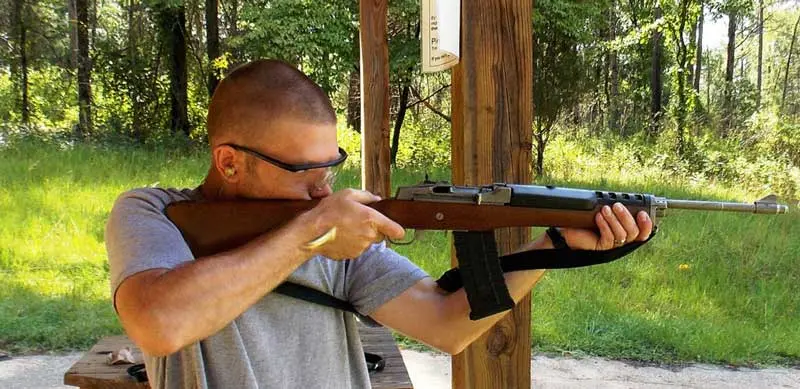
The “Hasty Sling” is an alteration that can be applied to all the previously mentioned shooting stances for long guns. In this position, the sling wraps across the chest, under the support elbow and back around the wrist. The tension created helps to steady the firearm if the sling is properly sized.
The Hasty Sling is a good tactic to learn if you enjoy hunting. This is a great addition to all positions and can help improve accuracy, without impeding your maneuverability.
GRIP BASICS
Your grip is a main component of your shooting stance because it is your direct interface with the firearm. Without a solid grip, your shooting stance doesn’t matter. Additionally, having a proper grip is important for attaining proper accuracy and reliability out of your firearm.
RIFLES AND SHOTGUNS
When gripping rifles or shotguns, the support hand rests under the forend for improved stability and maneuverability. This can be as forward or rearward as is comfortable for you, but typically the further out possible, the more control you will have over the firearm.
Additionally, the stock should be pressed firmly into the pocket of your shoulder. This will help to control the recoil for faster and more accurate follow-up shots. On models with pistol grips, simply wrap the dominant hand around the grip as high as possible, with the top of your middle finger touching the bottom of the trigger guard. Make sure you can easily operate any controls on the firearm from this position.
On long guns with traditional stocks, the grip is similar, just more angled in line with the stock. This angle actually helps the arm absorb recoil more naturally, but limits some maneuverability.
You'll also notice when picking out a shotgun that some lack a stock entirely and use just a pistol grip. With these types of shotguns you'll want to ensure a firm grip on the pistol grip and forend in order to handle recoil.
SEMI-AUTOMATIC PISTOLS
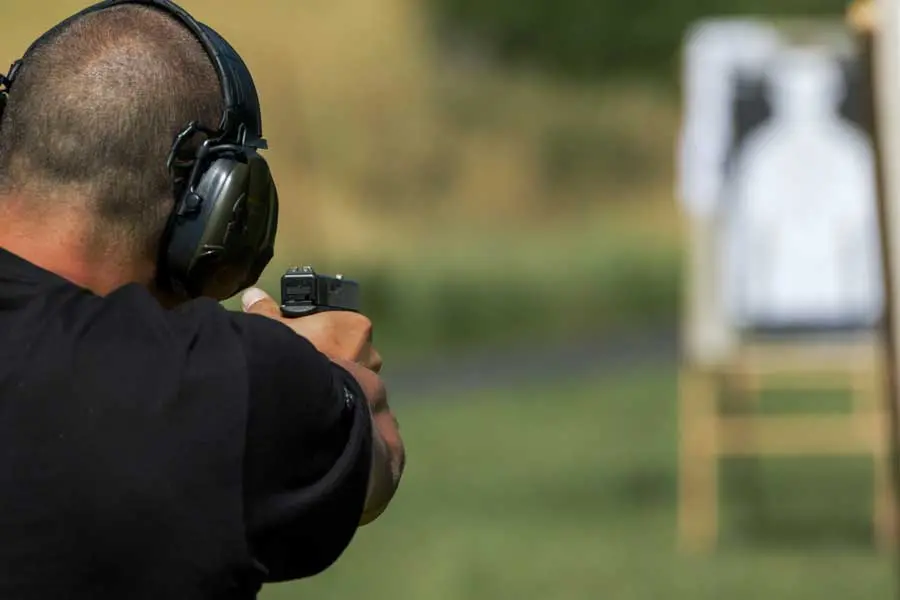
When gripping semi-automatic pistols, place the web of your dominant hand high up on the pistol’s backstrap and your middle finger high up against the trigger guard.
Then, wrap the rest of your fingers where they naturally fall on the grip of the handgun aside from your index finger, which should be placed along the side of the frame until you are ready to move it to the trigger and fire.
Press the palm of your support hand against the other side of the pistol’s grip frame. Be sure that you are not making contact with the slide at any point as this can induce malfunctions and injure your hands. Also make sure to not cross the thumb of the support hand behind the slide, keep it pointed forward.
Provide firm pressure by both hands to keep the pistol steady, some try to give percentages, but just try out different pressures from each hand until you find out what works best for you. The shooting hand should provide the majority of the pressure, while the support hand helps cinch the gun in the hand and keep it straight. Having a proper firm grip is especially important for hard-kicking handguns with a lot of recoil, as well as small pistols.
REVOLVERS
There are two main gripping methods for revolvers. One method is similar to gripping semi-automatic pistols where the dominant hand gets a secure grip on the handle and the palm of the support hand is pressed into the other side of the grip and the fingers are laid over the fingers of the dominant hand.
However, unlike semi-auto handguns, revolvers have a cylinder gap where some of the pressure of the fired round is released to the side. It is important to keep your fingers away from this gap as it can burn and harm you.
This is especially true with larger calibers or smaller revolvers where hand space is cramped. The next gripping method is referred to as the teacup grip. This has the same grip for the dominant hand as the one before, but the support hand is rested with an open palm cupping the bottom of the dominant hand.
This helps provide support for a steady shot, but does little in the way of recoil control. It will also help keep your fingers out of the way of the cylinder gap. Both methods can be effective with proper practice.
SHOOTING STANCE BEST PRACTICES
These general steps are a great reference guide for those who are just starting out. These basics resemble some of the aspects of specific shooting stances, but are broken down into an easy-to-follow checklist you can bring to the shooting range.
1. Firm Grip
Having a firm grip on your firearm is important for proper accuracy and reliable functioning. A firm grip also helps with recoil control for faster and more accurate follow-up shots.
2. Slight Lean Forward
By slightly leaning forward, you increase your balance and stability. This also helps you bring your eyeline down to the firearm’s sights. This is further enhanced with your shoulders rolled slightly forward.
3A. Arms Extended, Elbows Slightly Bent (handgun)
When shooting a handgun, your arms should be extended in front of the body with your elbows slightly bent.
3B. Elbows Bent and Out, Stock Pressed Snug to Pocket of Shoulder (long gun)
When shooting a long gun, the stock should be pressed firmly into your shoulder pocket and your elbows should be bent and slightly raised.
4. Legs Shoulder-Width Apart
Having your legs shoulder-width apart will help improve your balance and stability by giving you a rock-solid platform to base the rest of your shooting stance.
5. Knees Slightly Bent
Having your knees slightly bent increases your blood circulation and lowers your center of gravity for improved balance and maneuverability.
6A. Feet Side to Side (handgun)
Place your feet side to side for solid balance and stability. This will also help to keep you facing the target downrange and prevent you from flagging other shooters at the range.
6B. One Foot Forward, One to the Rear (long gun)
Placing the dominant foot to the rear and the support foot forward will significantly aid in balance and the natural handling of your rifle or shotgun. The front foot should be pointed forward and the rear foot should be at a 45 to 90-degree angle for proper support.
7. Feet Facing Forward
Having your feet facing forward helps you stay balanced and is an important habit to build in case there comes a time where you need to move while shooting.
THE IMPORTANCE OF REPETITION
It is important to practice consciously checking your stance before shooting every time to begin gaining muscle memory and build proper habits.
When you begin training, try out all the methods and then decide what works best for you. Once you know what works, practice often to build your skill. It is important to make a proper grip and shooting stance like a reflex, so that you don’t have to think about it in an emergency situation. Additionally, once you get the proper stance down, you can focus more on having fun at the range and you will naturally be more accurate.
CONCLUSION
With the vast amount of shooting positions and types of firearms, finding the right shooting stance is largely dependent on individual preference and your current circumstance.
One stance may work at certain times, and another may be better for other occasions. Try them out and see what works best for you. Once you know what you like, you’ll begin to see improvements in your shooting skills, whatever the firearm.

